If you’ve mastered grilling burgers and brats and are ready to branch out, it’s time to bring your cast iron skillet into the mix.
Using a skillet on the barbecue is an easy upgrade that opens the door to foods you wouldn’t normally try over open grates. Think delicate fish, buttery smash burgers, sautéed veggies, or even gooey skillet brownies.
If you’re wondering how to use a cast iron skillet on the grill safely and effectively, this guide has you covered. We’ll walk you through the tools, techniques, and tips to cook smarter with cast iron, and help you understand when your grill grates are still the better choice.
Because here’s the thing: as great as grill grates are for sear marks and that high-heat char, they’re not always the right tool. Some dishes need the stability and heat control that only a heavy-bottomed skillet can offer. Knowing when to use each tool means fewer flare-ups, better textures, and deeper flavor.
Let’s get cooking.
Why Cook With Cast Iron?
A cast iron pan on the grill evens out heat distribution, minimizes flare-ups, and lets you bake, fry, or sauté right on your grill. No more losing diced veggies through the grates or burning sugary marinades onto your burners.
A cast iron skillet is one of the most versatile tools to add to your grill setup, delivering juicy sears, crispy edges, and a flavor-packed crust you can’t always achieve on traditional grates. Bonus: using a skillet can help keep your grates cleaner for longer.
Choosing & Prepping Your Skillet
Pick the right skillet for your grill
Not all skillets are grill-ready. Look for:
- Size matters: Measure your grill’s cooking surface. A 10–12” skillet fits most gas and kettle grills, but smaller or larger pans can work too—just make sure there’s room for airflow and to close the lid.
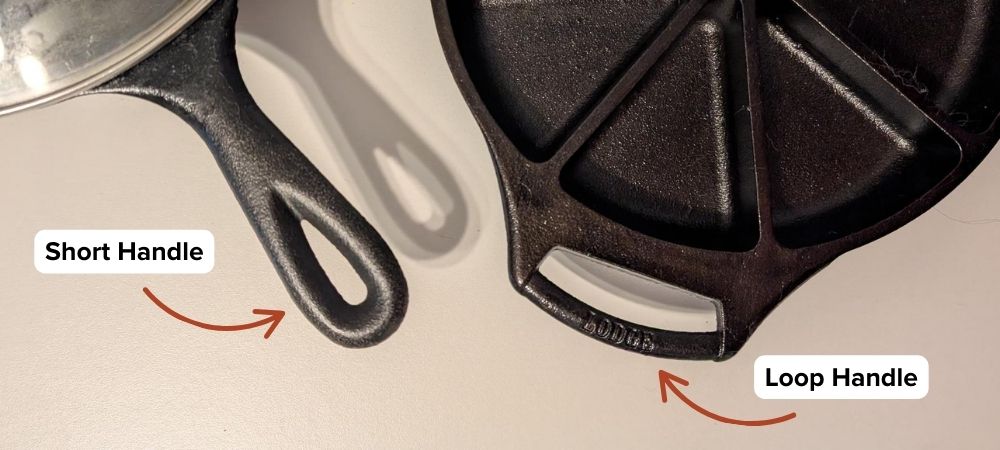
- Handle style: Go with short or loop handles—they’re easier to maneuver with gloves and fit better under a closed lid. The handles should be made of iron too, with no coatings or coverings.
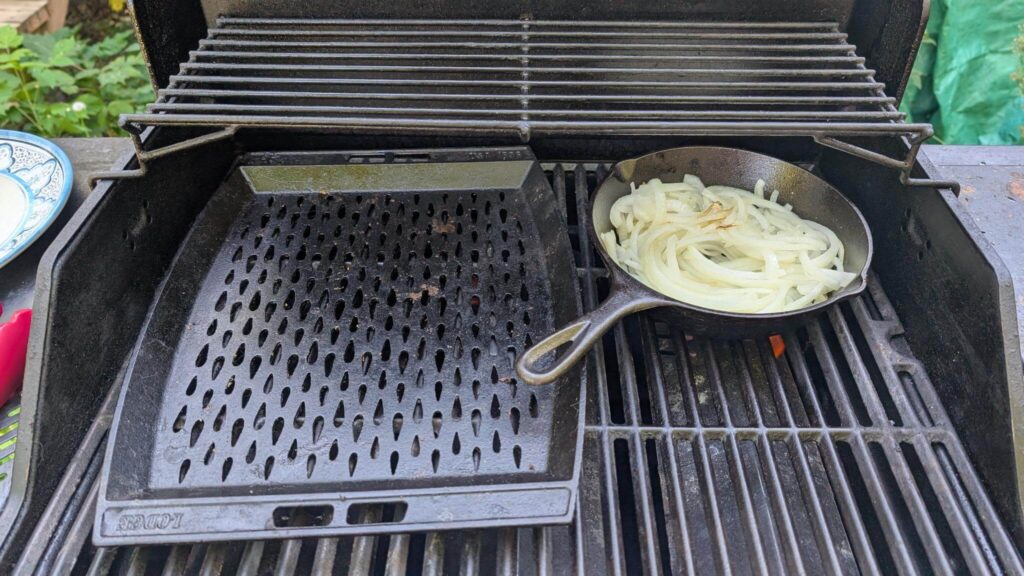
GRILL SPOT TIP: We like to use a 10” skillet on the grill grates, but an 8” skillet fits perfectly on the top warming rack.
Prep it right: seasoning refresher
Even pre-seasoned pans benefit from an extra coat:
- Apply a very thin layer of high-smoke-point oil (grapeseed, canola, flaxseed).
- Place in a 450°F oven (or indirect grill zone) for 1 hour.
- Let it cool, wipe it down, and you’re ready to cook.
GRILL SPOT TIP: Oven-seasoning a skillet can get a bit smoky (and smelly). Make sure you have decent ventilation in your kitchen by turning on your range fan or opening a window.
Tools checklist:
- Heatproof grill gloves
- Infrared thermometer (aim for 450–500°F preheat)
- Thin metal spatula or fish spatula
- Cast iron care kit
Step-By-Step: Using A Skillet On Gas And Charcoal Grills
1. Set up two heat zones
To use a cast-iron skillet on a gas grill, turn on one side to create your direct heat zone and leave the other side off for indirect heat.
If you’re using a cast iron skillet on a charcoal grill, bank the hot coals to one side to create your direct zone, and leave the opposite side clear to finish your food over indirect heat.
- Related Post: Direct vs Indirect Grilling Methods
2. Preheat your skillet
Place the skillet over the direct heat zone with the lid closed. Heat for 8–10 minutes until it hits 450–500°F. Use the water droplet test to check if it’s ready: splash a few droplets of water onto the skillet. If they sizzle and evaporate quickly, you’re good to go.
GRILL SPOT TIP: You don’t need to keep your skillet over direct heat the entire time you’re cooking, especially after it’s been pre-heated. We like to heat ours first over direct heat, then move it to the warming rack to continue cooking. With a heat-safe grilling glove, it’s easy to pick up and move a skillet around the grill as needed.
3. Sear, then finish indirect—or reverse sear
- Classic sear: Sear proteins over direct heat, then move to indirect heat to finish cooking.
- Reverse sear: Start cooking over indirect heat, then finish with a quick direct sear for crisp edges.
4. Add fats and ingredients in order
- Preheat the skillet before adding oil or butter.
- Add proteins (like smash burgers or fish) first.
- Add aromatics (like garlic, herbs) near the end to avoid burning.
BAKER’S NOTE: For cornbread, cobbler, or brownies, use indirect heat and keep the lid closed. Adjust your heat so the temperature is around 350–375°F, and rotate the pan halfway through baking for optimal results.
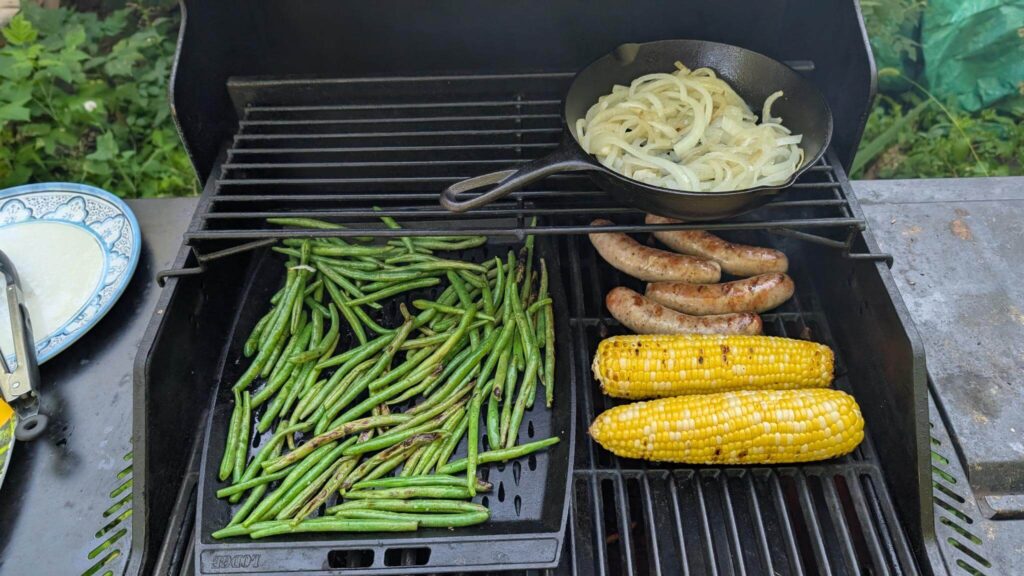
Cast-Iron Skillet Vs Grill Grates: When To Use Each
When it comes to cast iron skillet vs grill grates, it’s not a question of which is better. It’s about using the right tool for the job. Here’s a quick breakdown:
Use a skillet when you need:
- Support for small or delicate foods: If it breaks apart easily (like flaky fish) or risks falling through the grates (like diced veggies or shrimp), the skillet gives you the surface area and structure you need to cook with confidence.
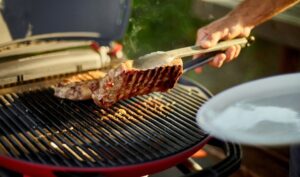
- Maximum sear and containment: Smash burgers, scallops, or cubed steak tips benefit from maximum surface contact without losing juices to the flames. The skillet holds heat steady and locks in that sizzle.
- Moisture control for saucy or sugary dishes: BBQ beans, glazed tofu, cheesy dips, or any dish with sugar or sticky sauces can burn onto the grates or drip onto your burners. A skillet prevents flare-ups and sticky cleanup.
- Sautéing, frying, baking, or simmering: Want to fry eggs, bake cornbread, simmer wine sauce, or make nachos? None of that works on the grates—but it’s a breeze in a cast iron skillet with the lid closed.
- Heat management: Skillets buffer the direct flame and give you a wider range of cooking temperatures, especially when combined with indirect heat zones.
Stick to the grates when you want:
- Direct flame char and grill marks: If your goal is a crisp crust or beautiful sear lines on a thick steak or chop, go with the grates. They let the flame work its magic directly.
- Quick cooking with surface contact: Kabobs, burgers, or hot dogs need high, open heat.
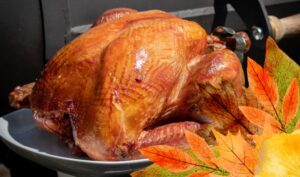
- Maximum airflow for smoke flavor: When smoking bone-in chicken, ribs, or brisket, grates allow for better airflow around the food, resulting in deeper smoke penetration.
- Crispy skin and charred edges: Think spatchcocked chicken, whole peppers, or sausages that take on a better flavor with a hint of blackened bite.
Understanding the difference between a cast-iron skillet vs grill grates helps you avoid common mistakes and achieve better results with different types of food.
Quick reference guide:
Bottom line? If you need to tame the flames or control the temperature, go with a skillet. But when you want that open-fire flavor, the grates still win.
Cleanup, Reseasoning & Long-Term Care
Once the grilling’s done, taking a few simple steps right away can make cleanup easier and keep your grill in top shape.
After cooking:
- Let the skillet cool for at least 10 minutes (don’t dunk it in cold water—thermal shock can cause it to crack).
- While it’s still warm (but not hot), use hot water and a chain-mail scrubber or salt paste to remove stuck-on bits. You can absolutely use dish soap as well for tougher stuck-on bits.
- Wipe dry immediately, then place the skillet back over a heat source set to low heat. Heat drying is more effective than towel drying, and it sets the pan up for successful seasoning.
- Rub the skillet with a thin coat of oil and return to the heat for 5-10 minutes. This helps the oil polymerize, creating that essential non-stick seasoning layer.
- Remove from the heat and let cool before storing.
Avoid these mistakes:
- Never soak a skillet in water.
- NEVER run a skillet through the dishwasher.
- Don’t store it while damp. Heat drying is the best way to make sure there’s no lingering moisture.
Keep your cast iron like new. Grab our Cast Iron Ultimate Cleaning Bundle.
Get Grilling With Confidence
Using a cast iron skillet on your grill is a simple way to cook smarter, avoid messes, and get more out of your barbecue. It’s perfect for small foods that fall through the grates, high-moisture dishes that flare up, or any recipe that needs steady heat and a crispy sear.
Whether you’re crisping up smash burgers or baking a skillet brownie, cast iron is your secret weapon for juicy, smoky results every time.