If visions of burgers, ribs, and cheerful cookouts with family and friends are dancing through your head, cleaning your grill is probably the last thing on your mind.
Gas grills are tough appliances, but they need a little TLC throughout the grilling season to keep them working at their best. Luckily, cleaning your gas grill is an easy task that shouldn’t take you longer than an afternoon once or twice a year.
Keep reading to learn how to clean your grill, including:
- Why you should clean your gas grill
- How often you should clean your gas grill
- How to clean a gas grill with vinegar
- Step-by-step instructions for deep cleaning a gas grill
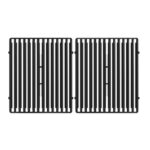
- How to clean gas grill grates
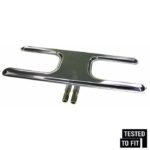
- How to clean gas grill burners
- How to keep your gas grill clean
Let’s jump in.
Why Clean Your Gas Grill?
Cleaning your gas grill every so often ensures that it can function at its best through the entire grilling season. Regular cleaning will help you:
- Prevent the unsafe build-up of grease and food particles, as well as carbon deposits that can harbor bacteria and impact the flavor of your dishes
- Avoid rust and deterioration, as well as premature part failure so your grill lasts longer
- Ensure that each part is functioning properly and that gas can flow easily through the burner ports, reducing the chance of flare-ups and uneven heat
How Often Should You Clean Your Gas Grill?
How often you should clean your grill—and how deeply—depends on how often you use your BBQ.
As a general rule, you should give your grill a deep clean at least once a year at the end of every season, or ideally twice per year if you use your barbecue more than weekly or grill year round. If you’re finding it difficult to get your grill up to full heat (over 500), it’s time to give it a good deep cleaning.
While a weekly or monthly deep clean may not be called for, some parts of your grill do require more regular cleaning to prevent premature failure or dangerous flare-ups:
- Grill grates should be cleaned after every use.
- The grease trap/collection tray should be cleaned at least once a month, or more frequently if you are grilling several times a week or are grilling fattier cuts of meat like rib steaks, burgers, lamb, and chicken with the skin on.
How To Clean a Gas Grill
There are a number of methods you can use to clean your grill. The right method depends on how deeply your grill needs to be cleaned.
- For relatively clean grills or a touch-up cleaning, a simple solution of vinegar and water may be sufficient.
- For grills that have never been cleaned or grills that have been heavily used, you’ll need dish soap, scrubbing brushes, a couple of buckets of water, and some extra elbow grease.
How to clean a gas grill with vinegar
If your grill is in good shape, the easiest way to touch it up is by using a spray bottle, water, vinegar, and a rag.
Simply add 2 cups each of white vinegar and water to a spray bottle and shake to mix. Spray the vinegar-water mixture onto the cooking grates and let it sit for 10 minutes. Then, fill a spray bottle with just vinegar, spray it onto a cotton cloth, and use the cloth to scrub the grates. When the grates are clean, you’re ready to grill—no rinsing required!
If your grill hasn’t been cleaned in months (or ever—no judgement), the vinegar method likely won’t cut it. Keep reading for detailed instructions how to deep clean a gas grill.
How to deep clean a gas grill
If your barbecue needs a deep scrub, the best way to clean a gas grill is to follow your manufacturer’s cleaning instructions, if you still have them. If you don’t, read our step-by-step guide for detailed instructions on how to clean a gas grill.
Supplies
- Rubber gloves (technically optional but strongly recommended)
- A bucket or two
- Grill brush or other non-metal coarse cleaning brush. If you don’t have a brush, you can use wadded up tin foil and tongs.
- Non-metal bristle brush or putty knife
- Rags, paper towels, and/or scouring sponges
- Soap and water
- White vinegar and baking soda to spot treat tough spots
- Stainless steel cleaner, if you have a stainless steel barbecue.
GRILL SPOT TIP: If you didn’t properly clean and winterize your grill before storing it or it’s still not firing up after performing some basic spring maintenance, chances are it’ll need a little extra TLC after its long rest. Check out our guide to post-winter grilling problems and how to fix them.
Method
- Fire up your grill and let it reach full temperature. Let it heat for 15-20 minutes to singe off any stuck-on food and grease. While the grill is hot, dip the grill brush into warm, soapy water and scrub the grates. Be prepared for a little steam!
- Turn off the gas, disconnect and remove the gas tank, and let the grill cool completely.
- When the grill has cooled completely, remove the cooking grates and set them aside. If they’re especially grimy after your first scrub, soak them in a tub of warm, soapy water for at least 30 minutes.
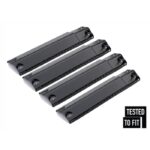
- Remove anything else from the grill that can be easily removed, such as warming racks, grease trays, control knobs, heat plates, and even the burners. This makes it easier to clean each component, as well as the bottom of your grill.
- Place a bucket under the grease tray opening and use a plastic putty knife to scrape off any stuck-on gunk from inside your grill. You can also use a shopvac to suck out any debris.
- Scrub everything. Scrub the grill grates with a non-metal grill brush on both sides, using a paste of white vinegar and baking soda to spot treat any especially difficult to clean bits. Clean the burners, heat plates, and any other elements you removed as well using warm soapy water. Keep reading for detailed instructions on how to clean your gas grill grates and how to clean gas grill burners.
- Inspect everything. Look closely at the grates, burners, and heat plates for signs of corrosion or deterioration. If you find any holes, rust, or other serious deterioration, it’s time to replace that part. Inspect the burner tubes for blockages and clean the inside of them with a venturi brush—spiders like to make nests in burner tubes, especially if your grill hasn’t been used in awhile.
- Rinse and wipe everything down. Refresh your bucket of water and add a few squirts of fresh dish soap. Scrub down the entire grill with a large kitchen sponge and dry everything with a microfiber towel. Be sure to clean the inside of the lid as well—over time, smoke vapor and grease will form carbon deposits on the inside of the lid. These deposits will eventually peel, and while they’re not technically toxic, they’re not exactly appetizing or healthy to eat.
GRILL SPOT TIP: Avoid using steel wool, metal sponges, or coarse scouring pads on finished surfaces to prevent scratches.
- Reassemble your grill. Rub the clean grill grates with a light coating of vegetable oil, reconnect the propane tank, and fire up the grill with a closed hood for at least 15 minutes, then turn it off. This will burn off any cleaning residue, re-season the grates, and confirm that you’ve reassembled everything properly.
How to clean gas grill grates
If scrubbing your grill grates and soaking them in warm, soapy water doesn’t get them clean, you may need to give them a harder scrub. The right way to deep clean your grill grates depends on what material they are made of.
- For stainless steel cooking grates, cover the top of the cooking grate with aluminum foil and preheat the grill for 15 minutes to burn off any remaining food and make it easier to scrub the grill after it cools. Brush the grates with a stainless steel grill brush or a bristle-free grill brush and rub them with vegetable oil to re-season.
- For porcelain coated cooking grates, try to burn off any lingering food first, then let them cool completely. Remove the grates and use a nylon or soft bristle brush to scrub them clean. Do not use a wire brush or metal bristles, which will damage the surface of the porcelain.
- For cast iron cooking grates, start by heating your grill to burn off any lingering bits of food. Let the grates cool, then use a soft bristle brush to scrub away any remaining debris. Apply a light coating of vegetable oil then heat the grill to dry off any remaining moisture and re-season the grill grates.
How to clean gas grill burners
Your grill’s burners are the powerhouse of your barbecue. Cleaning your gas grill’s burners regularly will extend the life of your grill, improve the quality of your cooking, and prevent flare-ups while delivering consistent heat.
Here’s how to clean your grill’s burners:
- Remove the cooking grates, heat plates, and burners and set them aside.
- Clean the burner tubes using a venturi brush or bottle brush to remove debris. Scrub in an up-and-down motion, not side-to-side, to avoid pushing debris from one hole into another.
GRILL SPOT TIP: Never use the same brush you used to clean greasy components to clean your burner tubes—this can transfer grease from the grates and other components into the burner.
- Clean the burner elements with soapy water and a soft cloth or nylon brush.
- Dry the burners and reassemble your grill.
Before you reassemble your grill, take a moment to inspect the burners. If you spot any rust or deterioration, it’s time to replace the burner.
How To Keep Your Gas Grill Clean
There are a few simple things you can do to keep your grill clean between uses and make your next deep cleaning even easier:
- Brush the grill grates before every time you grill. Preheat your grill and use either wadded up foil, an onion, or a brush to remove burnt bits of food.
- Oil the grate before you grill so food doesn’t stick.
- Brush the grill grates after grilling as well, before things have a chance to really get stuck on.
Cleaning Your Gas Grill
Your gas grill works hard through the summer grilling season. In addition to routine cleaning, giving your BBQ a deep clean once or twice a year will improve the quality of your grilled creations, keep your barbecue in top condition, and prolong the life of your grill.
Deep cleaning your grill is the perfect opportunity to inspect its internal components for deterioration. If you spot any holes, rust, or deterioration, it may be time to replace some of your grill’s parts. Replacing grill parts like heat plates, burners, and cooking grates is easy and can significantly extend the life of your grill.


