Moving bulky items is always a stressful experience, especially when they can be used to start fires like your trusty grill. Whether you’re moving house or transporting a grill for any other reason, we’re here to answer any questions you may have about how to move a gas grill.
Moving bulky items is always a stressful experience, especially when they can be used to start fires like your trusty grill. Whether you’re moving house or transporting a grill for any other reason, we’re here to answer any questions you may have about how to move a gas grill.
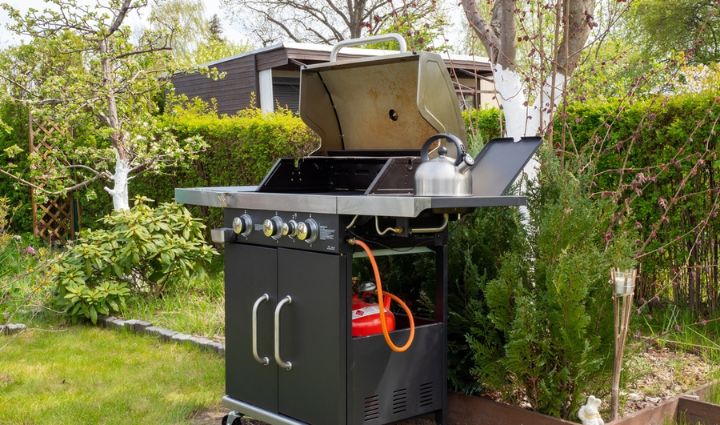
Here’s some good news: gas grills are actually not that challenging to move, as many of them are built to be moved around—you just need to have a large enough vehicle. However, it’s important to take a few precautions during the relocation process in order to ensure your grill arrives in good condition.
In this post we will explore the steps you need to take to relocate your grill to its new home, including:
- Cleaning the grill
- Disconnecting the gas
- Disassembling and packing up parts
- Prepping the grill for moving
- Moving the grill, including how to move a gas grill and how to move a heavy grill
Let’s get cooking.
1. Cleaning the grill
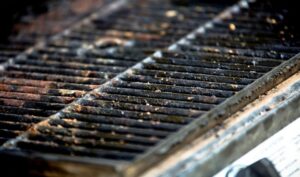
Grills can get pretty grimey with use, so chances are you’ll want it clean before you prepare it for transport or pack it away with your other belongings. That delicious scent of barbecue may be desirable during the summer, but it’s not so pleasant when it permeates all your other household goods.
In addition to preventing that grill smell from spreading to your other stuff, cleaning your barbecue will also reduce the risk of attracting insects and rodents—something that is especially important if your barbecue will be in storage for any amount of time.
GRILL SPOT TIP: It can take awhile for a grill to cool down completely. As a result, you should plan to clean and fully turn off your grill at least 48 hours before you need to move it. Double check the cooking chamber before you start packing it, since it tends to retain heat for longer than the other grill components.
To clean your grill, you’ll need the following supplies:
- Rubber gloves
- Dish soap
- Grill brush
- Scraper or putty knife
- Rags, paper towels, and/or scouring sponges
- Two buckets of water
- Soap
- White vinegar and salt
- Specialized cleaners for your grill (i.e. seasoning oil for cast iron or stainless steel polish)
With your supplies in hand, it’s time to clean:
- Heat up your grill to its highest possible temperature and leave it on at this temperature for 15-20 minutes. This will help burn off any stuck-on food and grease and make the cleaning process easier.
- After turning it off but while the grill is still hot, dip the grill brush into your bucket of warm soapy water and carefully scrub the grates.
- Turn off the gas, disconnect the gas line and remove the tank if it is propane, and let the grill cool completely. To make it easier to clean each component, as well as the bottom of your grill, remove any piece from the grill that can be easily removed.
- When the grill has cooled, remove the cooking grates and inspect them. If they’re still grimy after your first pass with the soap, scrub the grill grates with a non-metal grill brush and use a paste of white vinegar and salt to spot-treat any especially difficult-to-clean bits.
- Clean the burners, heat plates, and any other elements you removed using warm soapy water. Look closely at the grates, burners, and heat plates for signs of corrosion or deterioration. If you find any holes, rust, or other serious deterioration, it’s time to replace that part.
- Place a bucket under the grease tray opening and use a plastic putty knife to scrape off any stuck-on gunk from inside your grill.
- Inspect the burner tubes for blockages and clean the inside of them with a venturi brush—spiders like to make nests in burner tubes, especially if your grill hasn’t been used in awhile.
- Rinse and wipe everything down. Refresh your bucket of water and add a few squirts of fresh dish soap.
- Scrub down the outside of the grill with a large kitchen sponge and dry everything with a microfiber towel. If it’s really caked with grease, you may need to let it soak for 10 minutes to make removing the grease easier. Rinse and repeat as needed. Don’t forget the inside of the lid—over time, smoke vapor and grease will form carbon deposits.
- Reassemble your grill.
- Rub the clean grill grates with a light coating of vegetable oil, reconnect the propane tank, and fire up the grill with a closed hood for at least 15 minutes, then turn it off. This will burn off any cleaning residue, re-season the grates, and confirm that you’ve reassembled everything properly.
- Make sure the grill is bone-dry and has been able to sit for 48 hours to completely cool down before preparing it for packing.
Shop for grill cleaning supplies:


Need more help with getting your grill gleaming? Check out Grill Cleaning FAQs: How to Clean a Grill Like a Pro
2. Disconnecting the gas
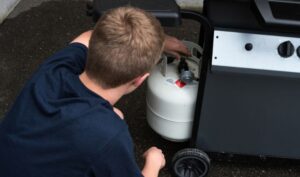
Whether you have a propane gas grill or a natural gas grill, you will need to disconnect the tank or the grill from the source in order to move it. Follow these steps:
- Ensure that the gas is turned off at the source (propane tank or the line from the house)
- Close the lines on the grill
- Detach the hoses and pack them away either with the grill or inside of a box of grilling stuff
GRILL SPOT TIP: Propane tanks are considered a hazardous material, so movers legally can’t move them for you. You’ll have to move the tank on your own in your personal vehicle, or return it and buy a new one at your new home. Make sure to store it away from direct sunlight if you are transporting it yourself.
3. Disassembling and packing up parts
Disassembling your grill before you move it makes it lighter and easier to move, and more likely your grill will get through the move unscathed. Take out any grill parts that aren’t screwed into place, including:
- Grill grates
- Side shelves
- Warming racks
- Grilling utensils
- Attachments and accessories
- Lid (if it can be removed)
Wrap the smaller parts in paper to protect them from scratches before packing them away, then label the box clearly with its contents. If your lid is detachable, wrap it in moving blankets and secure it with packing tape to ensure it doesn’t get scratched or damage other items during the move (or your vehicle).
4. Prepping the grill for moving
Preparing the grill itself for the move is fairly straightforward. All you need to do is wrap the grill in a moving blanket and secure it in place with packing tape, taking care to leave the wheels and handles uncovered to make transporting it easier.
If the grill lid is staying attached to the body of the grill during the move, seal it shut with packing tape to keep it from rattling or opening during the moving process. If your grill’s frame contains drawers or cabinets, remove or tape them shut as well.
5. Moving the grill
With your grill prepped and ready to move, it’s time to load it onto your moving vehicle. Most gas grills are light or portable enough that they can be safely and easily moved by one or two people. You’ll need:
- A large enough vehicle, like a cargo van or pickup truck
- A loading ramp
- Rope or ratchet straps to secure the grill to the vehicle
How to move a gas grill
First, you’ll have to get the grill onto the truck:
- If your grill has wheels, pull from the front as it was designed to be moved this way. If your grill requires two movers, have one person pull and guide from the front and another person push from the back end. Carefully pull the grill to the truck and up the ramp.
- If your grill does not have wheels, use the handles to lift and carry it to the truck.
Once the grill has been loaded onto the truck, lock the wheels if possible and secure it to the truck wall using moving straps to keep it from sliding around.
How to move a heavy grill
If you find your grill is too heavy to move easily by pushing it on its wheels or lifting it, then you may need to use a moving dolly and recruit an extra set of hands to help you out.
- Have one or two people tilt the grill, while the third slides the dolly into place underneath it
- Secure the grill to the dolly with moving straps to keep it in place
- Use the dolly to lift the grill and push carefully up the ramp and onto the truck
Once the heavy grill has been loaded onto the truck, unload it from the dolly and secure it to the truck wall using moving straps to keep it from sliding around.
Conclusion
Moving house is hard, but thankfully moving a gas grill is a fairly straightforward process:
- Clean the grill
- Disconnect the gas
- Disassemble and pack up removable parts, such as grill grates
- Prep the grill for moving by wrapping and securing it in a moving blanket
- Move the grill by lifting it, pulling it on its wheels, or using a moving dolly